
- 公開日:
iCloudなしでiPhoneでカレンダーを共有する方法
iCloudを使用せずにiPhoneでカレンダーを共有するには、使用しているカレンダーサービスの種類に応じて、さまざまな方法があります。
ここでは、特に人気のあるサービス「Google カレンダー」と「Microsoft Outlook」から直接カレンダーを共有する方法をご紹介します。
Google カレンダー
Google カレンダーアプリまたはウェブサイト経由
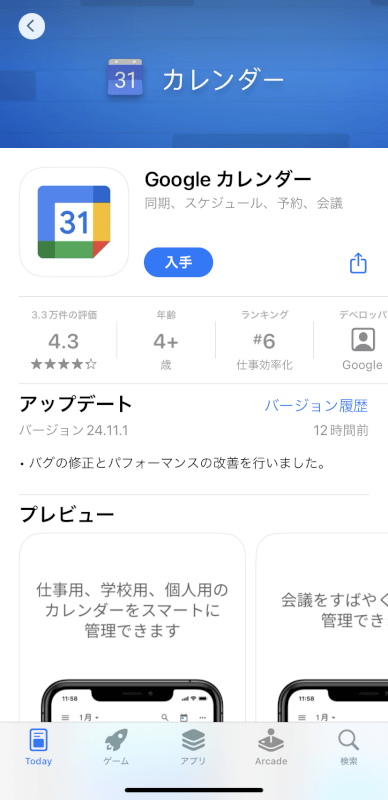
まだの場合はApp Storeから「Google カレンダー」アプリをインストールするか、Webブラウザを使用してGoogle カレンダーのウェブサイトにアクセスします。
以下では、「Google カレンダー」アプリでの操作を例にご説明します。
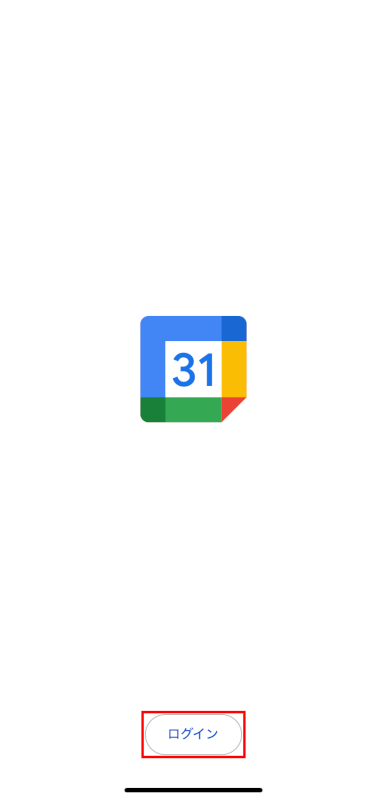
Googleアカウントでログインします。
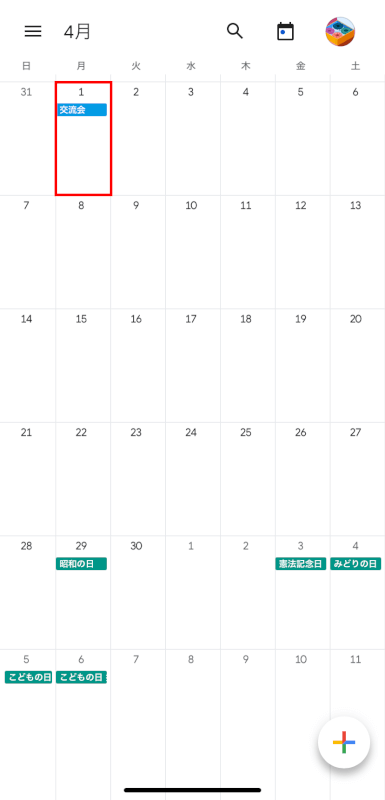
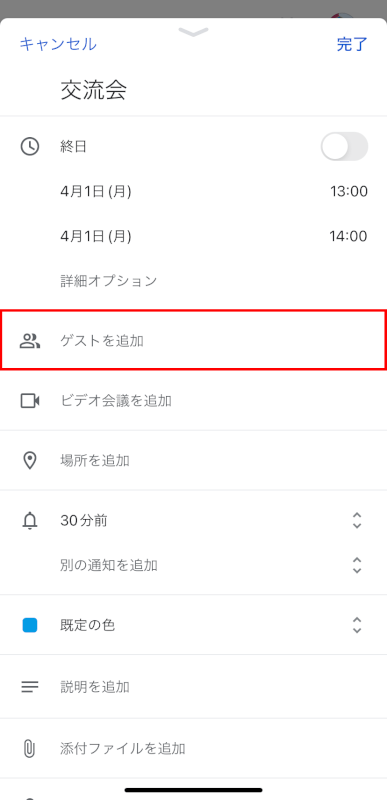
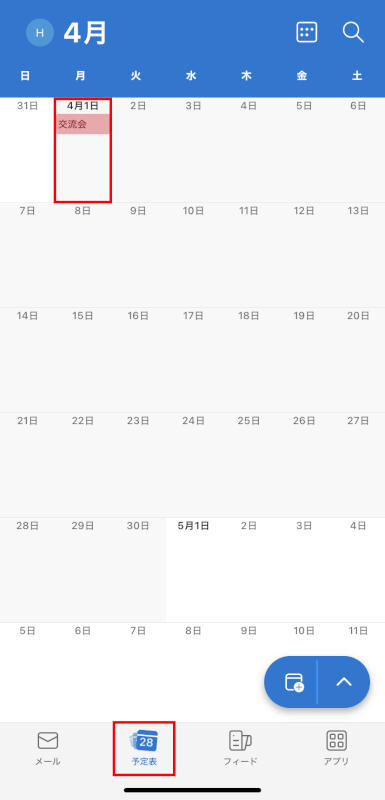
共有したい予定を見つけます。
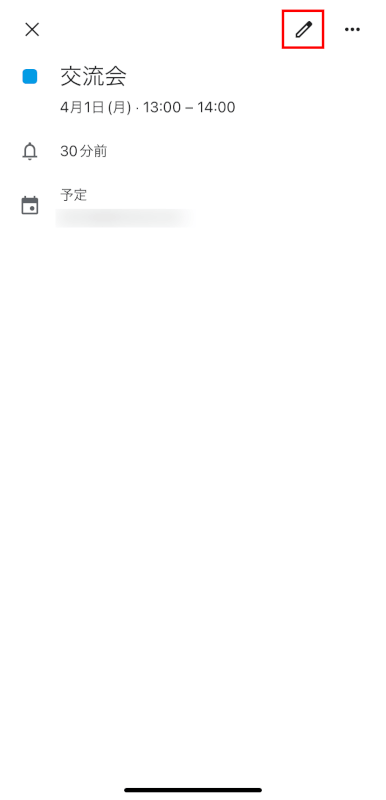
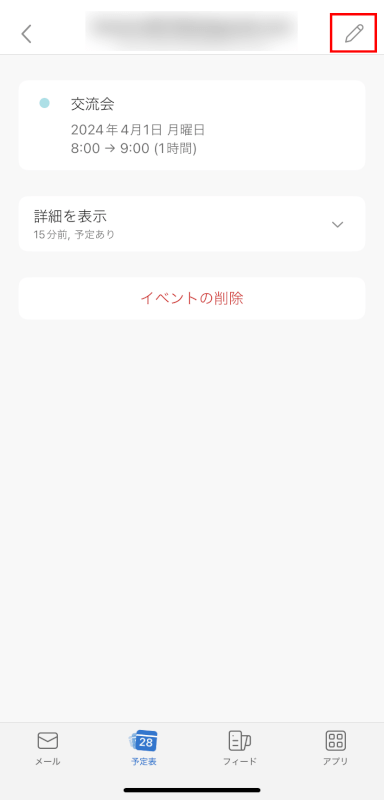
予定の詳細画面を開いたら、右上の「編集(ペンのアイコン)」をタップします。
「ゲストを追加」を選択します。
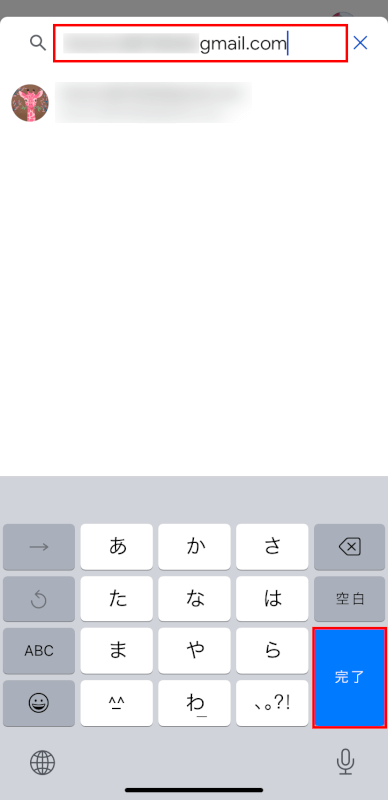
上部の入力バーに予定を共有したい人のメールアドレスを追加し、キーボードにある「完了」をタップします。
右上の「保存」をタップして、共有を開始します。

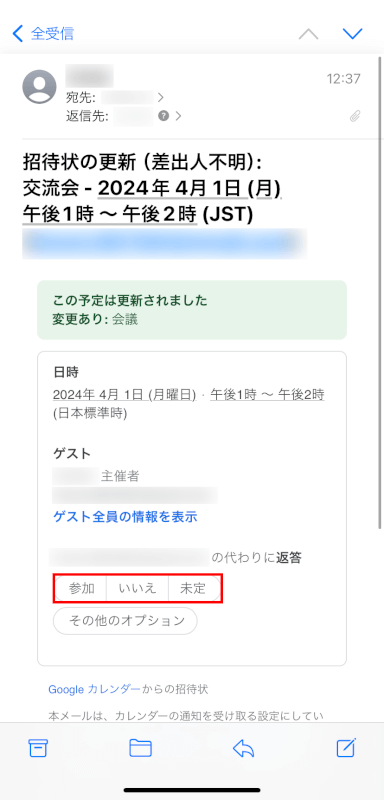
招待された人は、カレンダーの招待状を受け取ります。
メールにある参加の有無を返答するボタンをタップすると、その返答の通知を受け取ります。
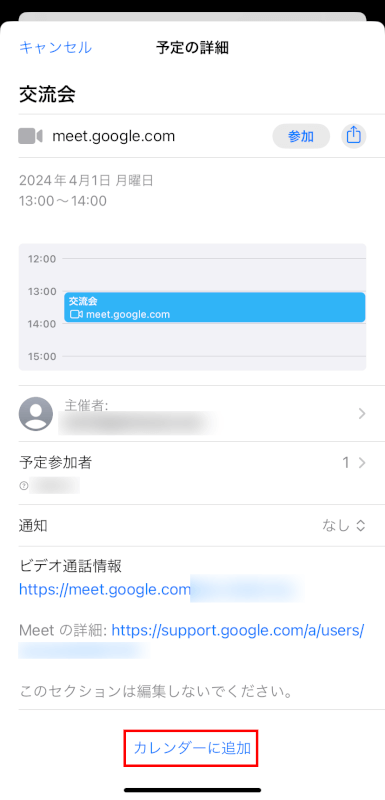
また、メールの下部にカレンダースケジュールのデータファイル(ICS ファイル)が添付されています。
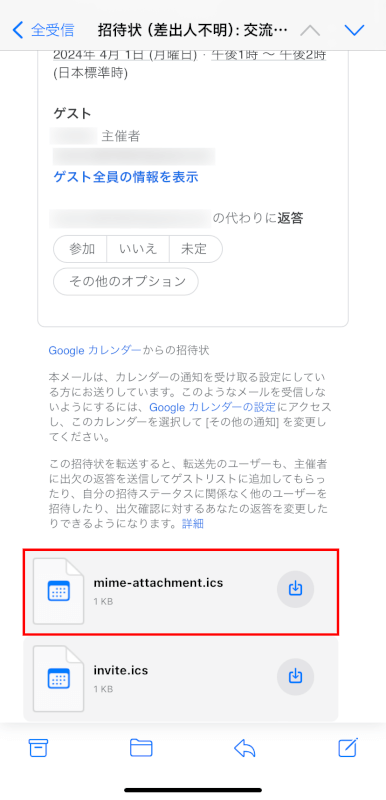
その添付ファイルをタップすると、予定の詳細と自身のデバイスのカレンダーに追加するオプションが表示されます。
下部の「カレンダーに追加」をタップして予定を追加します。
共有ではなく、iPhoneでGoogle カレンダーを表示する方法
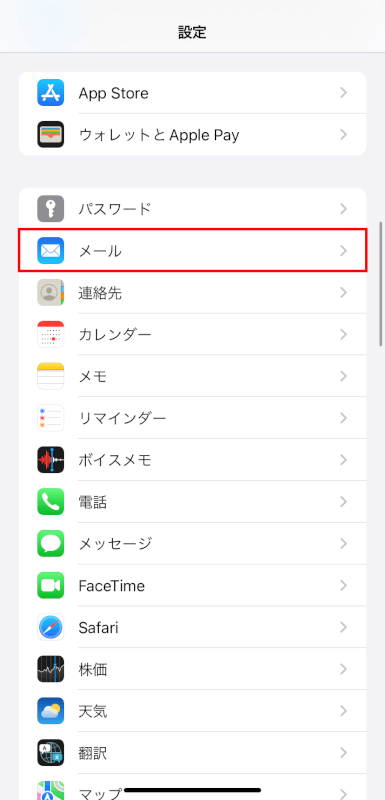
iPhoneの「設定」アプリを開きます。
「メール」(iOS 13以前のバージョンの場合は「パスワードとアカウント」)をタップします。
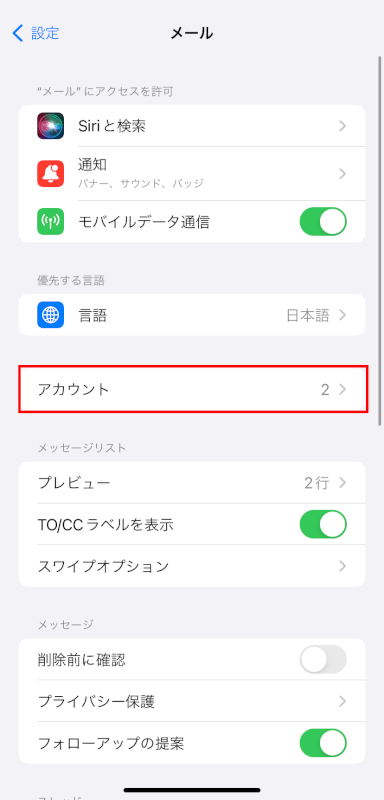
「アカウント」をタップします。
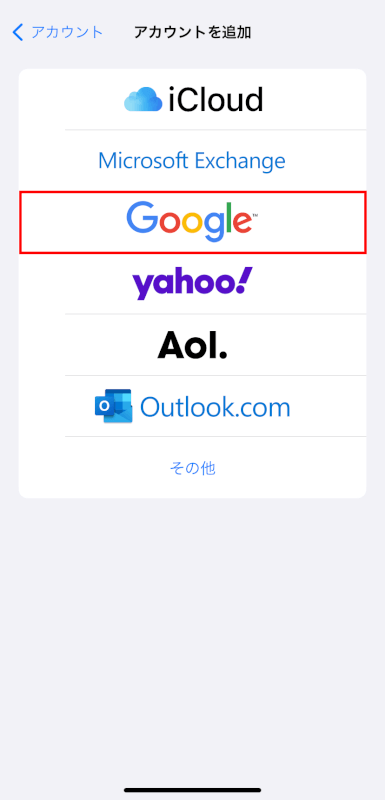
「アカウントを追加」をタップします。
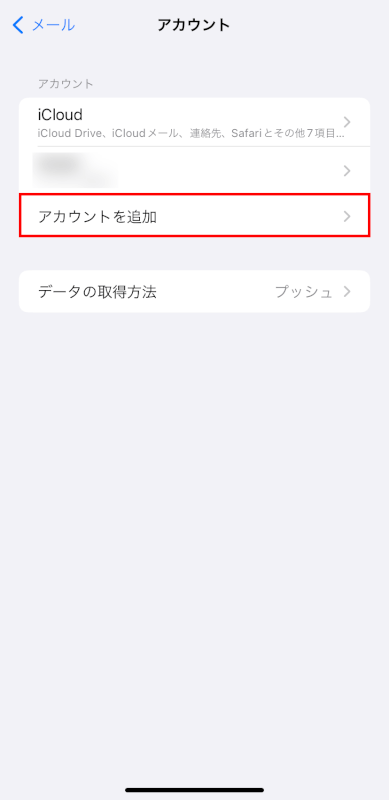
「Google」を選択します。
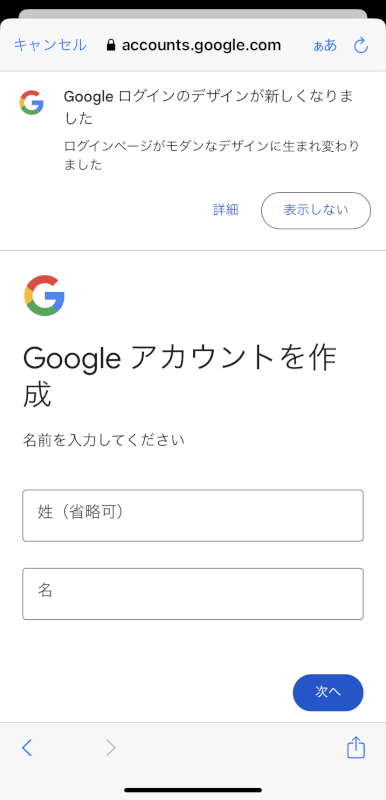
指示に従ってGoogle アカウントを作成/追加します。
追加または作成したGoogle アカウントをタップします。
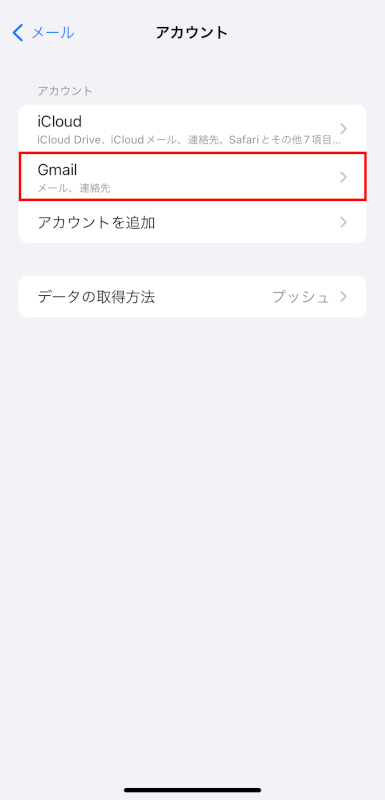
「カレンダー」のトグルがオンになっていることを確認します。
これで、iPhoneの「カレンダー」アプリでGoogleカレンダーを表示します。

Microsoft Outlook
Outlookアプリまたはウェブサイト経由
「Microsoft Outlook」アプリをダウンロードするか、OutlookのWebバージョンにアクセスます。
以下では、「Microsoft Outlook」アプリでの操作を例にご説明します。
Microsoftアカウントでサインイン、またはアカウントを作成します。
下部にある「予定表」タブを選択し、カレンダーを表示させます。
共有したい予定を見つけてタップします。
予定の詳細を表示させたら、右上の「編集(ペンのアイコン)」をタップします。
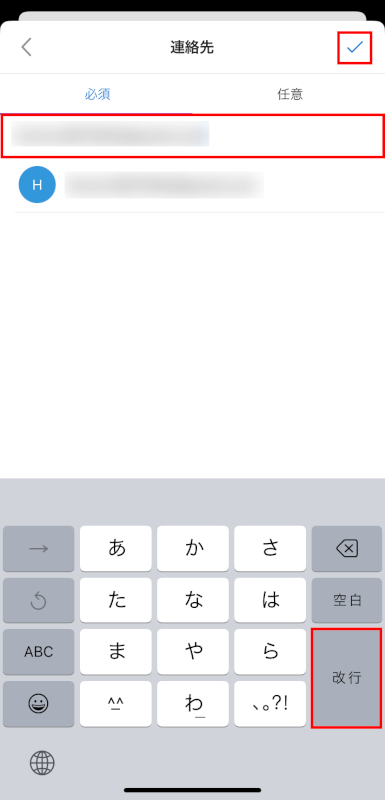
「連絡先」をタップします。
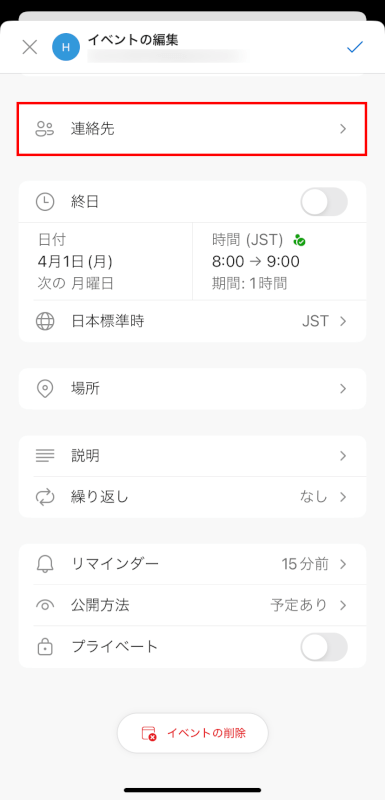
カレンダーを共有したい人のメールを入力し、キーボードの「改行」をタップします。
入力が完了したら、右上「チェック」アイコンをタップします。
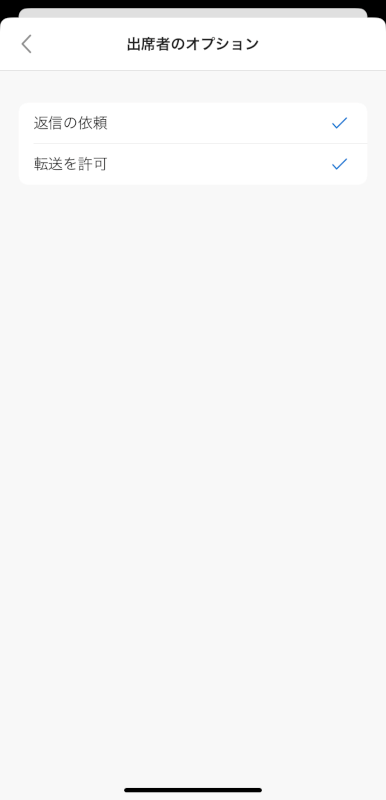
「出席者のオプション」をタップし、その人の権限レベルを設定します。

この画面でチェックを入れたり外したりして、設定を行います。
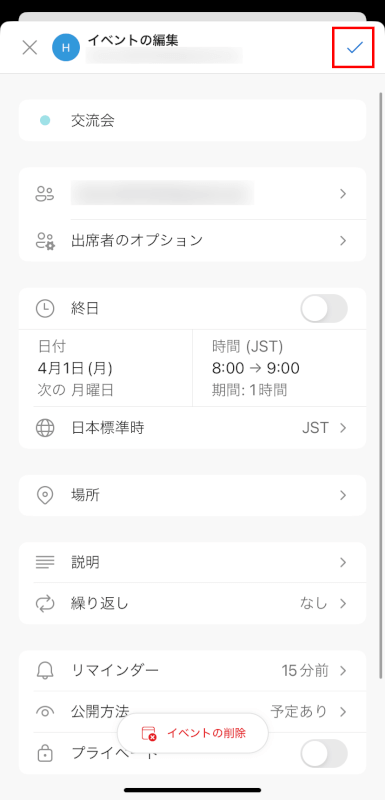
設定が一通り完了したら、右上の「チェック」アイコンをタップして共有を開始します。
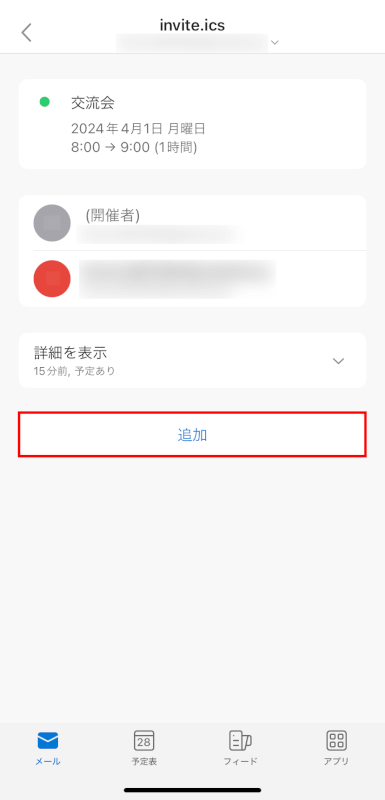
受信者は、予定の招待をメールで受け取ります。添付のics形式のファイルをタップします。
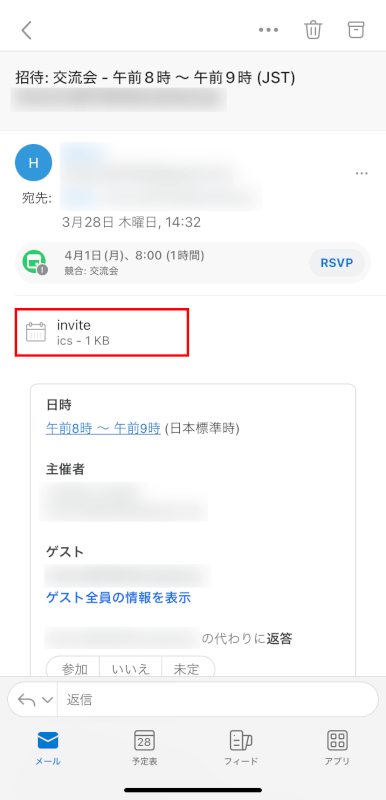
予定の詳細が表示され、下部にある「追加」をタップして自分のデバイスに予定を追加します。
さいごに
iCloudを使用せずにカレンダーを共有する場合、使用しているサービスのプライバシーとセキュリティ設定を考慮することが不可欠です。
常に、あなたのカレンダーデータがどのように共有され、誰がアクセスできるのかを確認してください。
問題は解決できましたか?
記事を読んでも問題が解決できなかった場合は、無料でAIに質問することができます。回答の精度は高めなので試してみましょう。
- 質問例1
- PDFを結合する方法を教えて
- 質問例2
- iLovePDFでできることを教えて
コメント
この記事へのコメントをお寄せ下さい。